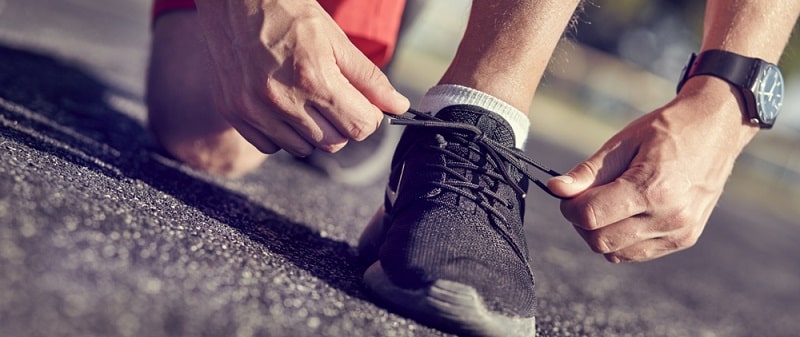
You have shoes, but you’ve probably never thought much about your shoelaces. You probably don’t know what kind of material they’re made from, what type of lace you have, or anything else other than the color of your laces. We’re here to educate you on the kinds of shoelaces that exist and the types of styles you can have.
What Are shoelaces Made From?
Cotton
Shoelaces on popular tennis shoes or fashion shoes, like Chuck Taylors, Vans, and Keds, will come with flat cotton shoelaces. They’re mostly white, but they come in a variety of colors such as red, yellow, black, glitter, and rainbows.
Cotton shoelaces also come in a round style depending on your preference. The difference between round and flat laces don’t affect the shoelace’s performance, so the different shape comes down to the customer’s choice.
Cotton is easy to clean with cold water. For shoelaces, it’s best not to put them in the dry to avoid melting or damaging the aglets. Since the laces are thin, though, they should dry within a day if placed in a bright, well-ventilated area.
This type of shoelace is also cheap. If for some reason your laces rip or get too dirty to be washed, you can buy a replacement pair at little cost. Since cotton shoelaces are widely available, they’ll be available in most shoe and drug stores.
Textured Polyester
You’ll find this type of shoelace on boots and work shoes, as they’re more durable than the only cotton and have water-resistant properties because of the polyester.
Some shoes require textured polyester laces because of its durable properties, such as ice skating shoes and skateboarding shoes. The polyester materials make them thicker, so they’re less likely to get tangled and endanger the skater because of their constant movements.
There are fewer color options for textured polyester shoelaces compared to cotton laces, so you’ll most likely be stuck with white, or maybe black, laces.
Still, these shoelaces are machine washable but should be air-dried to avoid frying the polyester and aglets. With proper care, these shoelaces can last their owner for a long time.
Spun Polyester
Spun polyester is similar to textured polyester, except that spun polyester laces will look more uniform and smoother than its textured brethren. The spun polyester will still be durable yet soft enough to bend and sag under their own weight. They won’t look like the corded shoelaces that are typically seen in other shoelace types, as we’ll see with nylon laces.
Nylon
Nylon shoelaces are one of the most durable laces. They’re thick and thus tangle-resistant, but they resist dirt and water as well. They’re a tad bit more expensive than the other options on this list, but they’ll be worth the investment for how long they last. Despite their increased cost, these shoelaces still won’t break the bank.
Elastic
Elastic shoelaces tend to attach to the horizontal holes of the shoe, allowing you to slip in your feet without the need to adjust the laces. Thus, if you want to transform your shoes into the best no-tie versions they can be, elastic shoelaces are the way to go.
The company Hickies offers the no-tie transformation option, but other companies provide the long laces that happen to stretch.
Don’t Forget the Aglet
The hard plastic coating at the end of the shoelace has a name — It’s called the aglet.
The aglet protects the edge of the shoelace from fraying. If you’re trying to redo the lacing of a shoe, the aglet makes the braiding process much easier, as the plastic facilitates the shoelace going through the shoelace hole.
While aglets tend to come in plastic when you first purchase the shoelace, there are different options for those who want variety with their aglets, especially if you’re tired of broken aglets betraying frayed shoelace ends.
- Metal Aglets. You can find metal aglets in most hobby stores. You attach the metal aglet to the end of the lace and voila, your aglet will never break and will always facilitate braiding.
Just be sure to remember telling security officers of your metal aglets when passing through a metal detector. You never know what the results could be from such a small piece of metal.
- Threaded Aglets. If you have the time and patience, you can create a tight aglet by wrapping thread around the edge of the shoelace. Just note that while cheap and visually appealing, it’s hard to make the thread stay in place. You might have to revisit your aglet multiple times to ensure it stays.
Knowing how to create a threaded aglet helps you if you’re an avid camper or hiker and are often away from civilization. However, if you’re within civilized borders, you might find threaded aglets too much trouble for what they’re worth.
- Adhesive Tape Aglets. If you need a quick fix, wrap some adhesive tape on the end of the shoelace to create the aglet. It will take you a few minutes to do and provide acceptable results. The tape aglet won’t be durable, though, so you’ll have to redo the process repeatedly — especially after walking around in the rain.
Not only that, but the tape could come loose and pick up dirt and debris from the street. That once crisp and clean-looking aglet could become dirty and gross, forcing you to change out the tape yet again. While cheap and quick, this style of aglet should only be used as a temporary fix until you find a more enduring aglet.
- Glue or Nail Polish Aglet. As for another quick and cheap DIY aglet, you can coat the end of the aglet in superglue to ensure it doesn’t become frayed. You can also cover the shoelace end in several layers of nail polish to provide the same effect.
The glue or nail polish method is a bit more dependable than adhesive tape. It will look better too. However, it’s not a permanent solution as the glue or nail polish could break the coating. Once the glue or nail polish shatters, you’ll have to pick off the old layer before applying the new one, otherwise creating a lumpy aglet.
Again, this method is a great quick-fix but shouldn’t be considered a long-term solution.
- Melting the End of the Aglet. If your laces are made from synthetic material like nylon, you can hold the shoelace end over a flame and burn an aglet on it.
Of course, burn the shoelace outside, as you don’t want to inhale singed synthetic material in an enclosed space. This type of aglet only works if you don’t care about the appearance of your laces and use them solely for functional purposes. Otherwise, people will wonder what fire you stepped in to create such a shoelace.
Creating this type of aglet, though, is much more durable, as you’ll rarely have to redo burning the aglet. For a simple yet long-lasting fix, consider burning your synthetic shoelace to create the aglet.
- Knotted Aglet. While it’s not what you typically think of when you think of an aglet, you can knot the end of your shoelace to stop the edges from fraying.
This is the simplest and cheapest option to create an aglet that you can do anywhere, whether in the city or while camping. However, don’t consider this option if you intend on redoing the lacing on your shoes, as you’ll have to untie and retie the aglet back in.
It would also be challenging to knot thicker or synthetic laces such as nylon and textured polyester, as the knots may be too bulky to appeal to the eye. If you have laces, though, you shouldn’t have too much of an issue tying a knot for your aglet.
Types of shoelace Styles
For a quick video describing five easy and stylish shoelace designs, watch this simple YouTube video. Otherwise, continue reading for more shoelace styles you can do at home.
Criss-Cross Lacing
Look at your shoe. Now, looking at one of the top two eyelets, pick one and insert an aglet into it. If you chose the top left, you’d snake the same aglet down to the eyelet second down on the right. Then snake that aglet to the third eyelet down on the left side, and so forth until you reach the bottom aglet.
Once you reach the bottom eyelet, insert the aglet into the eyelet directly next to it so that the lace makes a horizontal line. Then snake the aglet up through all the eyelets you missed before until you reach the top.
The criss-cross is the shoelace style most mainstream shoes will come with when taken out of the box. It’s an excellent style to have if you want your shoes to avoid attention and be purely functional. If you’re testing out other shoelace styles and aren’t sure which one to go with next, the criss-cross is an excellent neutral position to keep until you you make up your mind.
Check out how to clean white shoelaces.
Straight Bar Lacing
Straight bar lacing gives your shoes a put-together, neat look to them. Especially with clean white laces, they provide an elegant note to elevate your whole outfit one level.
However, only do this lacing technique if your shoes have an even number of eyelets. Otherwise, you’ll have to double up on one line and give your shoes a messy look.
To get straight bar lacing, insert your shoelace at the bottom two eyelets and pull it together so that it’s even. Make sure the left lace was put into the hole as if going into the shoe’s sole, not out toward you. Then, snake the left aglet through the eyelet immediately above, then to the eyelet immediately to the right of that one.
Still focusing on the left side of the shoelace, take the aglet and poke it out of the eyelet two holes above the one you just laced, ensuring that the aglet points out toward you. Pull the lace and lace it through the hole immediately to the left of it.
Do the same mirrored lacing for the eyelet above. Skip one and point the hole out toward you, pulling it out. Lace it through the eyelet directly horizontally next to it and continue that process until you get to the top.
Once the left side of the lace is done, do the same with the right side of the lace. If you’re having trouble, follow this simple guide. It has visuals and color-coded laces sides to further along the process.
Commando Lacing
If you’re dead set on the straight lace look but have an odd number of eyelets, the Commando Style Lacing is for you.
Basically, you’ll insert your shoelaces into the bottom hole into the eyelet directly next to it until you get to the near edge of the eyelet. Underneath the row of eyelets, tie off the end of the shoelace in a knot.
Then, you’ll snake up the shoelaces one eyelet at a time, creating straight lines that are visible on the outside but keeping the vertical snaking hidden underneath the row of eyelets.
Again, this is a clean look to have on your shoelaces to use if you have an odd number of eyelets. This isn’t a confusing style either and can be completed in minutes. Just be sure to monitor the knot underneath the eyelets to ensure it doesn’t come undone, as there’s no other way to tie your shoes with this look.
It might be weird to have just one aglet dangling from the top of your shoe, but at least your shoe will never be untied.
Sawtooth Lacing
This style looks cool to observers but it can be difficult to tighten your shoes since the laces are misaligned. Otherwise, the Sawtooth style of lacing isn’t strenuous to complete.
To create this style, lace your shoes horizontally at the bottom of your eyelets. Then, taking the left lace in hand, run it up internally through the shoe to the second-highest eyelet. Insert it to the eyelet directly to the right.
Once that’s done, run the lace diagonally so that it pokes out two eyelets up. Run the aglet through the hole directly to the right of it, then do the same process again until you reach the top. Repeat that process with the right side of the lace.
If you have difficulty, follow these instructions. The Sawtooth lacing style isn’t only easy to do once you get the hang of it, but it also adjusts the fit of the shoe. If you find your shoes are too big on your feet, you can use the Sawtooth style to tighten the feel of the shoe.
Hiking or Biking Lacing
While the above lacing styles can be done on hiking and biking shoes, a different lacing style is needed to benefit hikers and bikers.
The reason is simple — shoelaces that are too long or tie at the front can get snagged while on the trail or get caught in the wheels while biking. Wearers would also find tying their knots on the side of their shoe easier than in the middle so that they can tuck in the laces faster.
Lastly, functionality is the goal of hiking and biking, so the lace style should fit that. While not quite aesthetically pleasing, there’s still an efficient lacing style to make the lives of hikers and bikers much easier.
Start straight across the bottom eyelets, creating a horizontal line. Then, using the left side of the lace, run it up to the eyelet directly above it then to the right, creating an L shape of the lace.
Grab the right lace and snake it up over the eyelets, inserting it two eyelets above, then feed it through the eyelet directly to the left. Skip another hole vertically, insert it into the hole, then run it to the right eyelet. Do this for the right lace until you get to the top and repeat the process for the left lace.
Here are some of the best boot laces.
Again, be sure to follow the online instructions for this lace style, as reading the instructions can be burdensome to complete.
Once you’ve finished the hiker or biker style, though, you’ll find your laces feel much more secure, require less tying, and, when they do need to be tied, more accessible to do so. The laces will also last longer since you’re not stepping on the aglets as much.
As you can see with all the lacing materials and styles, shoelaces are much more diverse than you expected. Changing up the shoelaces and lacing style can revitalize an old pair of shoes, making them look years younger. Try branching away from the styling method you’ve had in the past and try out a new one. Get some different laces too.
You don’t think you can use shoelaces to express yourself, but there’s a whole unexplored fashion for you to explore. See laces for the vibrant possibilities they are and try out a new style today.