Crocs are convenient for casual wear due to their easy slip-on design. However, their soft material can wear down, leading to issues like stretched or torn straps and cracked soles. But don’t worry! I will provide you with practical tips for Crocs repair guide, helping you extend the life of your favorite shoes.
Contents
- I. Crocs Repair: Is It Easy to Repair Crocs?
- II. How to Repair Crocs Straps?
- Where to Buy Crocs Straps?
- How To Repair Coming Loose Lining?
- Holes in The Bottom of Shoes
- Cracks in The Soles or Upper Part of The Shoe
- Common Crocs Damage
- Maintaining Your Crocs
- Repair or Replace? Making the Right Decision for Your Crocs
- How to Repair Crocs with Eva Glue?
- Final Thoughts
I. Crocs Repair: Is It Easy to Repair Crocs?
Repairing Crocs is surprisingly straightforward. With just a few basic tools and some time, you can often fix them yourself, which is usually more cost-effective than buying a new pair.
Supplies Needed for Crocs Repair:
- Pliers for fixing broken straps.
- Needle and thread for sewing torn straps.
- EVA glue for mending cracks and holes.
- Bicycle chain-ring bolts, Chicago bolts, or replacement rivets for strap repairs.
However, note that significant tears, splits, or holes in the sole or upper part of the shoe may not be repairable.
II. How to Repair Crocs Straps?
Repairing worn Crocs straps is a manageable task. The most frequent issue is with the plastic rivets that attach the strap to the shoe, which can break or cause tears around the rivet area. With some effort, these can be fixed at home.
Here’s a video on how you can fix the broken rivets of your Crocs:
To start, gather all the materials you’ll need for the repair: Crocs straps, rivets, scissors, pliers, and EVA glue.
Steps to Repair Crocs Straps
Once you have everything, follow these steps to repair Crocs straps:
- Trim Damaged Straps: Use scissors to cut off frayed or damaged parts of the straps for a clean fit. If the strap is broken, glue the pieces back together or sew them with heavy-duty thread.
- Remove Old Hardware: If reusable, use pliers to remove old hardware like snaps or buttons from the straps.
- Align New Straps: Position the new straps against the shoes as the old ones were. Mark any adjustments needed for proper alignment.
- Attach with Rivets: Secure the new straps using rivets. If the original rivet hole is too damaged, create a new hole near it with scissors or a small knife, then insert the rivet.
Read Also: Do Crocs Stretch?
Where to Buy Crocs Straps?
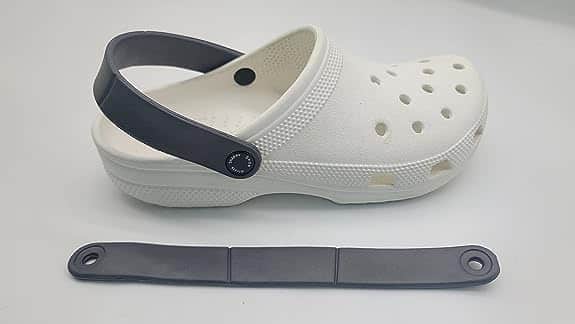
If your Crocs straps need replacing, Crocs offers free replacements. Simply contact their customer support with a photo of the broken strap and, if required, the purchase receipt. For alternative strap materials like leather, you can purchase new straps online. Amazon and eBay offer a wide selection and competitive prices, providing numerous options to find the ideal straps for your Crocs.
Here’s a video of changing out old straps to new custom leather straps:
How To Repair Coming Loose Lining?
Fixing loose lining in Crocs is straightforward. Here’s what you need and a step-by-step guide:
Materials:
- Super Glue or Shoe Glue
- Acetone or Rubbing Alcohol
- Cotton Cloth or Swabs
- Clothespins or Clamps
Steps:
- Clean the Area: Use rubbing alcohol or acetone on a cotton swab to clean the loose lining area.
- Assess the Damage: Trim any torn lining with scissors for a neater repair area.
- Apply Glue: Sparingly apply shoe glue or super glue to the lining. Avoid excess to prevent spreading.
- Press Together: Firmly press the lining back in place, aligning the edges accurately.
- Secure with Clamps: Use clothespins or clamps to hold the lining in place as the glue dries. Avoid over-tightening to prevent damage.
- Dry Time: Allow the glue to dry completely, which may take a few hours.
- Test the Repair: Gently bend and flex the shoe to ensure the lining is securely attached.
Below, I have an amazing video to help you understand better how to fix this broken lining issue:
If you notice the lining keeps coming loose, I think it’s best to contact the Crocs customer service or try going to professional repair.
Holes in The Bottom of Shoes
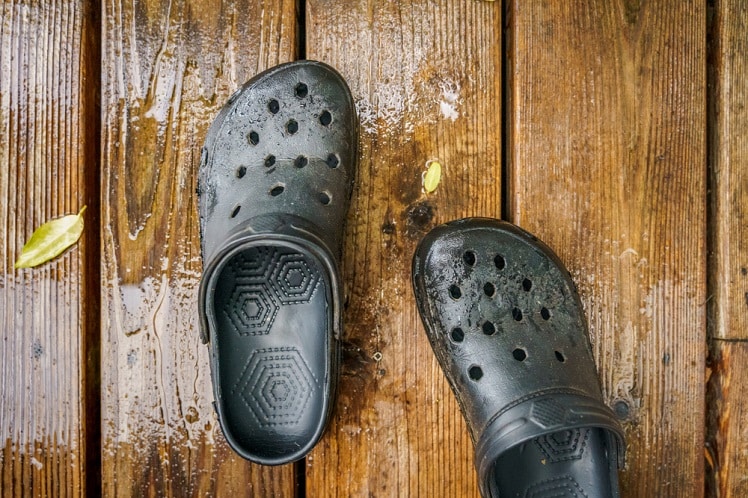
If you find holes in the bottom of your Crocs, it’s often just normal wear and tear. Here’s how to fix them:
Materials:
- Shoe Goo or Epoxy Resin
- Sandpaper
- Rubbing Alcohol
- Popsicle Stick or Small Spatula
Steps:
- Clean the Surface: Use rubbing alcohol or acetone on a cotton swab to clean the area around the hole.
- Roughen the Area: Lightly sand around the hole with medium-grit sandpaper to help the adhesive bond better.
- Prepare the Adhesive: Mix epoxy resin or prepare Shoe Goo as per instructions.
- Apply the Adhesive: Use a popsicle stick to evenly apply the adhesive over the hole.
- Press and Bond: Firmly press the surfaces together to ensure the adhesive covers the hole completely. Allow it to bond for a few minutes.
- Curing Time: Let the adhesive cure as per the product’s instructions.
- Test the Repair: Gently flex the shoe to check the adhesive bond and ensure the hole is properly fixed.
Cracks in The Soles or Upper Part of The Shoe
Cracks in Crocs can be fixed with EVA glue. Here’s what you need and a step-by-step guide:
Materials:
- EVA Glue
- Fine Grit Sandpaper
- Rubbing Alcohol or Acetone with Cotton Swabs
Steps:
- Clean the Surface: Use rubbing alcohol or acetone to clean the cracked area, ensuring a strong glue bond.
- Sand the Area: Lightly sand the cracked area with fine-grit sandpaper to create a rough surface for better glue adhesion.
- Apply EVA Glue: Use a small spatula to evenly apply the glue over the crack.
- Press the Surfaces Together: Hold the glued parts together for a few minutes to enhance the bonding.
- Remove Excess Glue: Wipe off any excess glue with a damp cloth before it dries.
- Curing Time: Allow the glue to cure as per the product instructions.
- Final Check and Smoothing: After curing, check the repair and lightly sand any rough edges for a smooth finish.
To understand the step-by-step guide better, here’s a video of fixing Croc soles if they are very worn out and you need more traction:
Common Crocs Damage
A. Fading or Discoloration on Crocs
Discoloration or fading on Crocs, often due to sun exposure or frequent cleaning, can be more noticeable on vibrant or darker colors. Here’s how to address it:
Materials:
- Mild Soap
- Soft Brush
- Baking Soda
- White Vinegar
Steps:
- Gentle Cleaning: Mix mild soap with water and gently scrub the Crocs with a soft brush.
- Baking Soda Paste: For stubborn stains, mix baking soda with water to form a paste. Apply to the discolored area, scrub gently, and let it sit before rinsing.
- White Vinegar Application: For significant discoloration, apply white vinegar with a sponge, let it sit, then wipe off.
- Air Dry: Dry the Crocs in indirect sunlight to prevent further color damage.
- Prevention Tips: Store Crocs in a cool, shaded area and rotate between pairs to minimize wear and tear.
Here’s a video to help you revive the Crocs color, especially the old one:
B. Shrinkage
Crocs, being made of rubber, can shrink over time, especially due to high heat exposure. Here’s how to restore their shape:
Materials:
- Basin of warm water
- Shoe trees
Steps:
- Soak in Warm Water: Fill a basin with warm water (not too hot) and submerge the Crocs for 5 to 10 minutes to relax the material.
- Stretch the Wet Crocs: After soaking, wear the Crocs while they’re still wet. Gently stretch them, focusing on the toe box and heel areas. Flex and bend the shoes to loosen the material.
- Insert Shoe Trees: While the Crocs are damp, insert shoe trees to help maintain their shape as they dry.
- Dry and Store: Let the Crocs dry in a well-ventilated area away from direct sunlight. Once dry, store them in a cool, dry place to prevent further shrinkage.
You can also watch the video below to shrink your big-size Crocs and unshrink it with other methods:
Maintaining Your Crocs
Keep your Crocs in top condition by regularly cleaning them with mild soap and water. Use a soft cloth to gently scrub the entire surface, focusing on textured areas to remove dirt. After cleaning, let them air dry or use a fan. Store your Crocs in a cool, dry place to avoid fungal growth and consider using baking soda inside them overnight to eliminate odors.
For added protection, apply a silicone-based spray to prevent stains and repel moisture, helping to maintain their color.
Repair or Replace? Making the Right Decision for Your Crocs
When deciding whether to repair or replace your Crocs, consider the extent of the damage and the age of your footwear. For minor issues like small cracks, loose linings, or minor sole damage, a DIY repair or professional service can extend their life.
However, if your Crocs have significant damage, like multiple cracks or severe sole separation, it’s probably time to invest in a new pair. Also, consider their age; if they’re quite old and showing wear and tear, replacing them might be more practical, especially given Crocs’ reputation for durability and versatility.
How to Repair Crocs with Eva Glue?
Crocs are made from a unique Corslite material, a lightweight, cushioning, and waterproof closed-cell resin. To effectively repair this material, EVA glue is recommended over super or gorilla glue, as it slightly melts the Corslite for a stronger bond.
Steps for using EVA glue:
- Read the EVA glue instructions for proper drying time.
- Clean your Crocs and ensure they are dry before applying glue.
- Apply a small, even amount of EVA glue to the damaged area.
- Use a clip or tape to keep the repaired area secure while the glue dries. If necessary, apply a bit more glue for a stronger hold.
Final Thoughts
Crocs, known for their comfort and unique style, can be easily repaired to prolong their lifespan. To fix your Crocs, start by thoroughly cleaning them with a soft brush or cloth to remove dirt and debris. Then, inspect for any cracks or holes, which can be effectively repaired using EVA glue.
After repairing, ensure the Crocs are completely dry before wearing them again. With these simple care steps, you can enjoy your Crocs for many more years.