
I own several pairs of checkered Vans: the Classic Slip-on, Checker Flame, US Open Old Skool, and the Comfycush Era LX (which is my favorite). So, you can trust me when I say that I know what I am talking about!
And here, I shall share some indigenous methods on how to clean checkered vans. I’ve tried these methods myself, and I can guarantee their effectiveness. However, before I get right to it, you might want to learn some interesting tidbits about Checkered Vans.
Contents
- I. How I Clean My Checkered Vans
- II. How to Clean Checkered Vans Using Any Household Items
- III. Comparing Cleaning Methods: Why Our Approach Stands Out?
- IV. Do’s and Don’ts
- V. Additional Tips For Maintaining Checkered Vans
- VI. Checkered Vans Shoecare to Keep Them Pristine
- VII. How to Restore Sun-Faded Canvas on Checkered Vans
- VIII. Testimonials: Success Stories From Real Users!
- IX. Conclusion
- X. Frequently Asked Question!
I. How I Clean My Checkered Vans
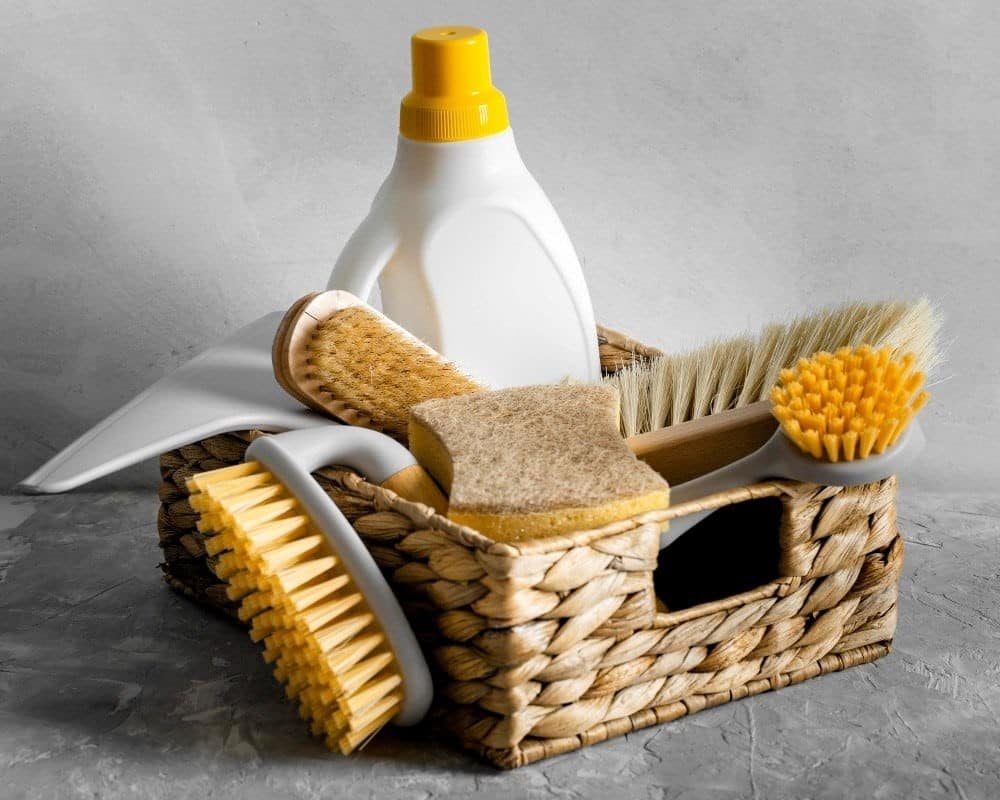
a. Cleaning Kit :
Before you start cleaning, you have to prepare the shoe-cleaning kit items. In addition, each item has different functions and purposes. I shall explain which tools and supplies you would need to properly clean your Checkered Vans!
| Cleaning kit items | Functions |
| Shoe cleaner | Soap for cleaning shoes (but first dilute it with water). |
| Apron | Keep your clothes from dirt and mess. |
| Premium brush | Remove dirt from the upper part of the shoe. |
| Medium brush | Scrub the dirt and dust from the midsole. |
| Standard brush | Clean the outsole. |
| Small brush or toothbrush | Clean the narrow and hard-to-reach inner shoes. |
| Microfiber cloth | Wipe and suede off the shoes after cleaning. |
| Shoe trees | Maintain the shoe’s shape from creases, preserving the shelf life. |
| Washbowl | As a container for mixing the water and shoe cleaner. |
| Shoe perfume | Add a refreshing fragrance after cleaning. |
b. Step By Step
Here are some steps to clean your favorite checkered vans.
- Prepare the dirty shoes

The first thing to do is get a pair of dirty checkered vans shoes to clean.
- Prepare the shoe cleaning kits

Next, prepare the shoe cleaning kits consisting of shoe cleaner, apron, various types of brushes (premium, medium, standard, and small), microfiber cloth, 2 pieces of shoe trees for each, a basin filled with water, and shoe perfume.
- Take shoe laces off
Before cleaning, take the laces off and soak them in the water and shoe cleaner solution. This process helps to make shoe cleaning easier and without hassle.
- Put a shoe tree on each shoe

Take the insole off and put a shoe tree inside to maintain the shoe’s structure and shape in the cleaning process.
- Dry clean the shoe

The next part is the dry cleaning process. Before cleaning the shoe with water, brush the upper shoe with a premium brush to remove the dirt and dust. Rub the upper shoe gently to avoid material damage that can cause your shoe to look bad.
- Clean the outsole and midsole

Use a standard brush to rub off the dirt from the outsole. To clean the midsole, you can use a medium brush. Scrub each part neatly, especially at the midsole, because the dust and dirt might be accumulated, thus making it a bit hard to remove. Therefore, it takes patience and precision in cleaning the midsole. Use a microfiber cloth to wipe the dirt after the cleaning is done.
- Clean the upper shoe

The upper shoe needs different treatments for cleaning, hence you must use a premium brush to clean it and avoid any scratches and damage. After that, wipe the upper shoe with a microfiber cloth. Don’t use a standard brush to clean the upper shoe because the brush bristles are coarser and might scratch the material.
- Clean the inside of the shoe

Use a small brush to clean the hard-to-reach inside parts of the shoe, then wipe the dirt with a microfiber cloth. You can also use a premium brush to clean the inside of the shoe, but don’t force it if the brush doesn’t fit into the narrow parts.
- Detailing

Use a wet microfiber cloth to clean shoe details, such as on the eyelets or other small parts. Alternatively, you can use wet tissues to wipe off dirt and dust as well although microfiber cloth is still the best option because it excellently absorbs water and dirt.
- Drying process

After the shoes are clean, dry them by aerating with a fan for around 1 to 2 hours. Don’t dry the shoes under direct sunlight because the color and pattern might be damaged or fade.
- Finishing

When the shoes are dry, take the shoetree off and put the shoelaces back. Your shoes are now clean and ready to wear. Spray in some shoe perfume to give a nice and fresh fragrance.
II. How to Clean Checkered Vans Using Any Household Items
This is how I usually clean my checkered Vans! Follow the steps carefully and put some effort into the details!
1. How to Clean Checkered Vans with Baking Soda

Step #1: Remove Laces
Take out the shoelaces from your checkered Vans. You can clean them separately by hand or replace them if they are very dirty.
Step #2: Prepare a Baking Soda Paste
In a small bowl, mix baking soda with a small amount of water to create a thick, paste-like consistency. If you prefer, you can add a few drops of mild dish soap to the mixture for extra cleaning power.
Step #3: Apply Baking Soda Paste
Using your fingers or a soft brush, apply the baking soda paste to the stained or soiled areas of your checkered Vans. Focus on any visible stains, scuffs, or dirty spots.
Step #4: Scrub Gently
With a soft brush or a toothbrush, gently scrub the areas with the baking soda paste. Use circular motions to work the paste into the fabric. Be careful not to scrub too hard, as it could damage the fabric or the checkered pattern.
Step #5: Let It Sit
After scrubbing, let the baking soda paste sit on the shoes for about 15-20 minutes. This allows the baking soda to break down stains and odors.
Step #6: Rinse and Dry
Use a clean cloth or sponge dipped in water to gently wipe away the baking soda paste from your Vans. Pat the cleaned areas with clean towels to remove excess moisture. Allow your checkered Vans to air dry naturally at room temperature. Avoid using heat sources like a hairdryer, as they can damage the fabric.
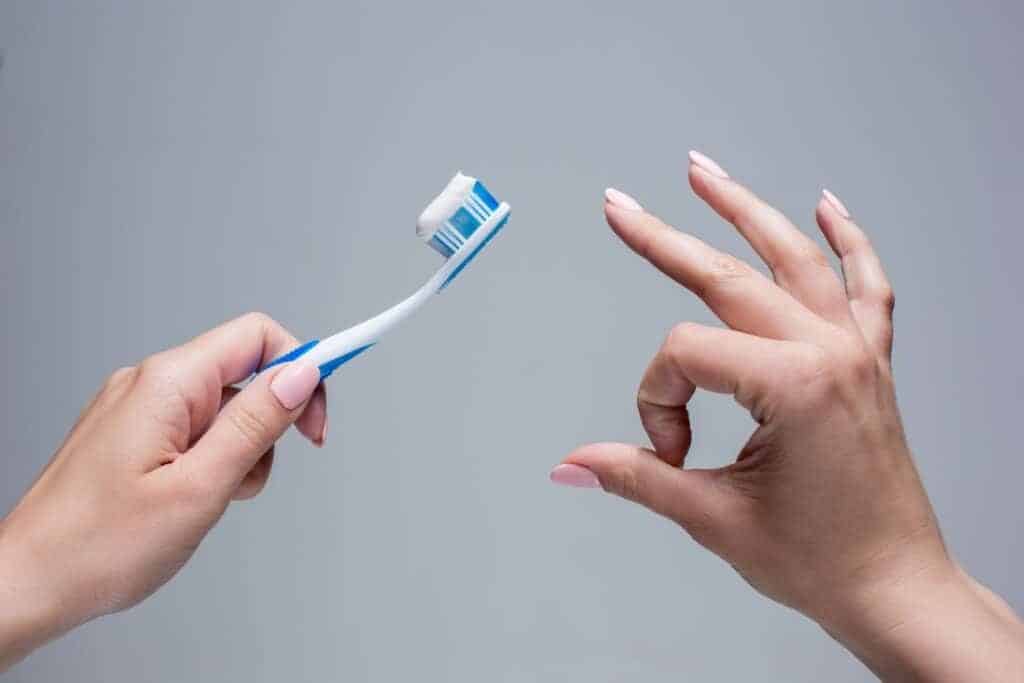
2. How to Clean Checkered Vans with Toothpaste
Step #1: Prepare a Cleaning Mixture
Once you have prepared the shoes, start creating a cleaning mixture. You can mix a small amount of mild dish soap with water in a small bowl. This mixture can help enhance the cleaning power of the toothpaste.
Step #2: Apply Toothpaste
Squeeze a small amount of white toothpaste onto the stained or soiled areas of your checkered Vans. For areas with discoloration or tough stains, you can use the toothpaste mixture you prepared in step 1.
Step #3: Scrub Gently
Using a soft brush or a toothbrush, gently scrub the areas with the toothpaste. Use circular motions to work the toothpaste into the fabric. Be careful not to scrub too hard, as it could damage the fabric or the checkered pattern.
Step #4: Allow Them to Sit
After scrubbing, let the toothpaste sit on the shoes for about 10-15 minutes. This allows the toothpaste to break down stains and brighten the white parts.
Step #5: Rinse
Use a clean cloth or sponge dipped in water to gently wipe away the toothpaste from your Vans. Make sure to rinse thoroughly to remove all the residue.
Step #6: Dry Thoroughly
With a clean towel, gently pat the cleaned area. Allow your shoes dry naturally.
3. How to Clean Checkered Vans with White Vinegar and Water

Step #1: Prepare a Vinegar and Water Solution
n a small bowl, mix equal parts white vinegar and water. If you prefer a slightly soapy solution for extra cleaning power, you can add a few drops of mild dish soap to the mixture.
Step #2: Apply the Solution
Dip a soft brush or toothbrush into the vinegar and water solution, and gently scrub the stained or soiled areas of your checkered Vans. Focus on any visible stains, scuffs, or dirty spots.
Step #3: Scrub Your Shoes
Use circular motions to work the solution into the fabric. Be careful not to scrub too hard, as this could damage the fabric or the checkered pattern.
Step #4: Let Them Soak
After scrubbing, allow the vinegar and water solution to soak on the shoes for about 10-15 minutes. This will help break down stains and odors.
Step #5: Rinse and Dry
Take a cleam microfiber cloth or sponge dipped in water to gently wipe away the vinegar solution from the shoes. Then, use a clean towel to remove excess moisture on the cleaned areas by patting them dry. Allow your checkered Vans to air dry naturally at room temperature. Avoid using heat sources like a hairdryer, as they can damage the fabric.
4. How to Clean Checkered Vans with Rubbing Alcohol

Step #1: Make a Cleaning Solution
Add a 1:1 ratio of rubbing alcohol and water in a small bowl. For more stubborn stains, you can add a few drops of mild dish soap to the mixture for added cleaning power.
Step #2: Test in a Inconspicuous Area
Before applying the cleaning solution to the visible areas of your shoes, it’s a good idea to test a small, inconspicuous area to ensure that the rubbing alcohol doesn’t cause any color fading or damage to the fabric.
Step #3: Apply the Cleaning Solution
Dip a soft cloth or sponge into the rubbing alcohol solution and wring it out so it’s damp but not soaking wet. Gently blot or wipe the stained or soiled areas of your checkered Vans with the solution. Pay attention to any visible stains, scuffs, or dirty spots.
Step #4: Rub Gently
For tougher stains, you can use a little more pressure, but be cautious not to scrub too hard, as it could damage the fabric or the checkered pattern.
Step #5: Rinse and Dry
In a bowl of water, dip a clean sponge or cloth to wipe away any remaining cleaning solution from your Vans. After that, remove moisture on the cleaned spots with clean towels and allow the Vans to dry naturally.
5. How to Clean Checkered Vans with Mild Dish Soap and Water

Step #1: Prepare the Cleaning Solution
Fill a bowl with lukewarm water. Add a small amount of mild dish soap to the water. A few drops are sufficient.
Step #2: Mix the Solution
Gently mix the water and dish soap to create a soapy solution. Make sure it is not too saturated to prevent stains.
Step #3: Dip and Wring
Dip a soft cloth or sponge into the soapy solution, then wring it out so it’s damp but not soaking wet.
Step #4: Clean the Shoes
Gently wipe the checkered Vans with the damp cloth or sponge. Focus on areas with visible stains, scuffs, or dirt. Be cautious not to oversaturate the fabric, as excessive moisture can damage the shoes.
Step #5: Rinse and Repeat
After cleaning, use a clean cloth or sponge dipped in plain water to wipe away any remaining soap residue from your Vans. Rinse thoroughly to remove all soap.
Step #6: Dry
Pat dry the cleaned areas to remove moisture by using clean towels. Let the shoes dry naturally or use a fan to accelerate the process.
6. How to Clean Checkered Vans with Laundry Detergent
Step #1: Formulate the Detergent Solution
In a basin, fill a lukewarm water. Add a small amount of laundry detergent to the water. A teaspoon or so should be sufficient. Gently stir the water to dissolve the detergent and create a soapy solution.
Step #2: Damp the Cloth
Dip a soft cloth or sponge into the soapy solution, then wring it out so it’s damp but not dripping.
Step #3: Start Cleaning!
Wipe the checkered Vans with the dampen cloth or sponge. Make sure you spot the areas with scuff, stains, or dirt.
Step #4: Rinse and Dry
After the cleaning process, take your clean cloth and dip it in plain water. Then, use it to wipe away any soapy residue from your Vans. To clean the shoes, use clean towels to pat them dry and let the Vans sit at room temperature to dry naturally.
7. How to Clean Checkered Vans with Magic Eraser

Step #1: Dampen the Magic Eraser
Wet the Magic Eraser with clean water. Squeeze out any excess water so it’s damp but not dripping.
Step #2: Rub the Stains and Dirt
Rub the checkered Vans with the damp Magic Eraser, focusing on areas with visible stains, scuffs, or dirt. Use a gentle, circular motion to clean the surface. Avoid applying excessive pressure, as it could damage the fabric
Step #3: Rinse and Wipe
Once you finished cleaning, use a clean, damp cloth or sponge to wipe away any residue left by the Magic Eraser.
Step #4: Dry
Use a clean towel to remove the excess moisture by patting the cleaned areas. Then, let the shoes air. To preserve their shapes, you can use shoe trees.
III. Comparing Cleaning Methods: Why Our Approach Stands Out?
What sets my Shoerazzi cleaning method apart for your checkered Vans is meticulous attention to detail and a range of specialized brushes.
I use premium and medium brushes for the upper and midsole, a standard brush for the outsole, and toothbrushes for hard-to-reach areas.
In addition, I clean the inner parts with small brushes and use a wet microfiber cloth for thorough cleaning, including the eyelets.
IV. Do’s and Don’ts
| Do’s | Don’ts |
| Clean your shoes carefully, and don’t miss any dirt or particles. | Don’t rub and clean the upper shoes too hard. It will ruin them! |
| Brush and rub gently if your shoes are made from sensitive materials. | Don’t dry your shoes under direct sunlight. It might damage and fade the shoes’ color. |
V. Additional Tips For Maintaining Checkered Vans
| Tips | Explanation |
| Regular cleaning | Do it once per month with a soft brush and cloth. |
| Use air drying | Let it dry naturally. Avoid hairdryers or radiators. They damage your shoes! |
| Don’t forget about insole care! | Remove them to air and clean them to prevent smelly odors. |
| Rotate your shoes | Avoid wearing the same pair every day to reduce tear. |
| Use stain-repellent spray | Apply it to prevent stains on canvas or fabric shoes. |
VI. Checkered Vans Shoecare to Keep Them Pristine

| What to do? | Explanation |
| Don’t store your shoes in humid area! | Bacteria and fungus grow in such conditions. |
| Don’t store your wet shoes directly! | It causes smelly, moldy, and crumble shoes. |
| Add silica gel pouches in your shoes | They minimize moisture absorption in your shoes |
| Don’t stack your shoes! | It damages the upper parts and the sole. |
| Use shoe boxes as shoe storage | It keeps the shoes clean and last longer. |
VII. How to Restore Sun-Faded Canvas on Checkered Vans
Now, if your Vans is aging, you will notice that the color will start to fade. No amount of cleaning can restore it, so here I shall share some tips on how to restore it!
1. Clean the shoes
Before you begin the restoration process, clean the shoes thoroughly to remove any dirt, grime, or stains. Follow the tutorial that I’ve explained above! Make sure that the pair is dry before you proceed to the next step.
2. Apply fabric paint
Once the shoes are completely dry, apply fabric paint to the faded areas. Choose a paint color that matches the original color of the shoes. I recommend that you use a paintbrush so you can be more precise.
3. Allow the paint to dry
Let the paint dry completely before applying a second coat. Follow the instructions on the paint container to determine how long the paint needs to dry.
4. Apply a second coat
If necessary, apply a second coat of paint to the faded areas to ensure that the color is even and consistent. Whenever I do this step, the end results always look better.
5. Allow the shoes to dry
After applying the paint, let the shoes dry completely for at least 24 hours. Do not wear the shoes or expose them to water or moisture during this time.
6. Protect the shoes
Once the shoes are dry, apply a water-resistant spray to protect them from future damage. This will help to prevent the color from fading again and keep the shoes looking new for longer.
And that’s all that you have to do to restore your old checkered Vans. It is easy to discard faded shoes, but continuously using them and restoring them is more sustainable. If you grow attached to your old checkered Vans, this trick will prolong its life span.
By the way, some people also recommend sharpie to restore the faded checkered pattern (it works if your Vans is the classic black-and-white checkerboard).
VIII. Testimonials: Success Stories From Real Users!
⦁ “I was honestly in doubt. I thought it would be nothing sort of magic! But it did! The collar and the sole, which were browning, started to fade away. I love how the method includes a toothbrush with its tiny head to reach the narrow parts of the shoes, especially the inner. Thanks a bunch!” – Michael.
⦁ “I am a Vans lover but often deal with dirt shoes, which frustrated me. But after I discovered this method, cleaning has never been easy! The toe cap is generally challenging to clean, but with your method, it worked! Will definitely recommend it to everyone.” – Ricky.
⦁ “My Checkered Vans looks like a brand-new, though I have had it for years! I usually used only one medium brush to get rid of the brown stains on the sole after hanging out with my pals. But apparently, small and big brushes are needed. Thanks for sharing!” – Chad.
IX. Conclusion
In conclusion, I hope this guide on how to clean checkered Vans has been helpful to you. Don’t let dirty shoes bring you down – with a little bit of effort and some simple cleaning supplies; you can keep your Vans looking fresh and new.
Remember to always test any cleaning solution on a small, inconspicuous area first and to be gentle when scrubbing to avoid damaging the shoe’s material.
With these tips, you can keep your checkered Vans looking clean and stylish for all your future adventures. So go ahead, get out there, and rock your clean kicks with confidence!
Latest post:
How To Clean Nike Shoes ⦁ With⦁ Mesh (Best Guides)
How to Clean White Crocs (6 Easiest Steps ⦁ &⦁ Alternative Methods)
Experts’ Advice on How to Clean White Canvas Sneakers
How to Clean Converse: Best Methods for Any Types
How to Clean Canvas Shoes (8 Easy Steps, Any Types ⦁ &⦁ Methods)
X. Frequently Asked Question!
1. How to clean checkerboard Vans in the washing machine?
First, clean the shoes of any dirt and mud. Don’t forget to clean the outsole part as well. After that, rinse the shoes before putting them in laundry bags for shoes. Put them into the washing machine and use a gentle detergent.
2. Is it safe to bleach the Vans checkerboard?
No! The liquid is too strong and will damage the pattern. Moreover, if the checkerboard pattern is a light cream, and the bleach might turn it white, which is bad!
3. Are there any cleaning agents to avoid when cleaning checkered Vans?
It’s best to avoid harsh chemicals like bleach, acetone, or strong solvents, as they can damage the fabric and colors. Stick to mild solutions like a mixture of water and a gentle soap or a specialized sneaker cleaner.
4. Can I machine wash my checkered Vans?
It’s generally not recommended to machine wash checkered Vans or any sneakers, as it can damage the shoes and affect their shape and adhesive. Instead, spot clean them with a damp cloth and mild soap to preserve their quality.
5. How often should I clean my checkered Vans to maintain their look?
To maintain the look of your checkered Vans, I highly recommend cleaning them every 2-4 weeks, depending on how often you wear them and the conditions you expose them to. You can also regularly brush off dirt and debris and give them a thorough clean every month or so.
6. How do you make old Vans look new?
To make your old Vans look new, wash them until clean and dry with a fan. You can also repaint the fading part of your shoe to look brand new.
7. What alternative cleaning solutions are suitable for checkered Vans shoes?
For your canvas shoes, you can try baking soda paste. But, if your Vans use suede, don’t use baking soda to clean it because this ingredient is abrasive! Toothpaste is also bad as it is abrasive and may contain a bleaching agent. I personally always stick to mild soap or detergent as it is safe and gentle.